That Cool Feel 😎...
That's the power of animation in any application(mobile or web), it gives the application that relaxed and cool feel. It just involves the user in the transition that happens within the application, Animations can be very cool trust me. So today I will be discussing a kind of animation and how it can be integrated into a mobile application using flutter (a programming language used in developing cross-platform applications).
Just to lay some foundation here...
What are Animations ❓
You probably have heard the word Animation a billion times before now, Basically speaking animation is said to be a method by which still figures are manipulated to appear as moving images.Lottie Animations 😕 ??
According to lottiefiles.com, A Lottie is a JSON-based animation file format that enables designers to ship animations on any platform as easily as shipping static assets. They are small files that work on any device and can scale up or down without pixelation.
To use a Lottie in any flutter application, we have to add the Lottie dependency In our pubspec.yaml file.
lottie: ^1.4.2
You can use a Lottie in your flutter application in two ways there are
- LottieBuilder.asset
- LottieBuilder.network
How do they work? 🧰
LottieBuilder.asset('lib/asset/lottie.json' )
you can download Lotties from lottiefiles.com amongst other websites as well.
Lottie.network('https://assets3.lottiefiles.com/packages/lf20_mGXMLaVUoX.json', ),
Now let's use a Lottie in our application 🧑🏽💻
Let's create a flutter project, And in our main.dart file we write this
import 'package:flutter/material.dart';
import 'package:lottie/lottie.dart';

void main() => runApp(const LottieApp());

class LottieApp extends StatelessWidget {
  const LottieApp({Key? key}) : super(key: key);

  @override
  Widget build(BuildContext context) {
    return const MaterialApp(
      title: 'Lottie App',
      home: HomePage(),
      debugShowCheckedModeBanner: false,
    );
  }
}

class HomePage extends StatefulWidget {
  const HomePage({Key? key}) : super(key: key);

  @override
  State<HomePage> createState() => _HomePageState();
}

class _HomePageState extends State<HomePage> {
  @override
  Widget build(BuildContext context) {
    return SafeArea(
      child: Scaffold(
        appBar: AppBar(
          title: const Text(
            'Lottie Application',
            style: TextStyle(fontWeight: FontWeight.bold),
          ),
          elevation: 0,
          backgroundColor: Colors.lightBlueAccent,
        ),
        body: ListView(
          children: [
            const SizedBox(
              height: 10,
            ),
            Container(
              padding: const EdgeInsets.all(25),
              height: 250,
              child: LottieBuilder.asset(
                'lib/asset/lottie.json',
                fit: BoxFit.fill,
              ),
            ),
            const SizedBox(
              height: 10,
            ),
            const Center(
                child: Text(
              'First Lottie Asset',
              style: TextStyle(fontSize: 20, fontStyle: FontStyle.italic),
            )),
            const SizedBox(
              height: 80,
            ),
            Container(
              padding: const EdgeInsets.all(20),
              child: Lottie.network(
                'https://assets3.lottiefiles.com/packages/lf20_mGXMLaVUoX.json',
                fit: BoxFit.fill,
              ),
            ),
            const SizedBox(
              height: 10,
            ),
            const Center(
                child: Text(
              'Second Lottie Asset',
              style: TextStyle(fontSize: 20, fontStyle: FontStyle.italic),
            )),
            const SizedBox(
              height: 30,
            )
          ],
        ),
      ),
    );
  }
}
🔔 Make sure you have an asset folder created and have any Lottie file of your choice downloaded and saved in your asset folder (I named mine lottie, the.json comes by default remember our definition of a Lottie), make sure your asset folder is referenced in your pubspec.yaml file as well.
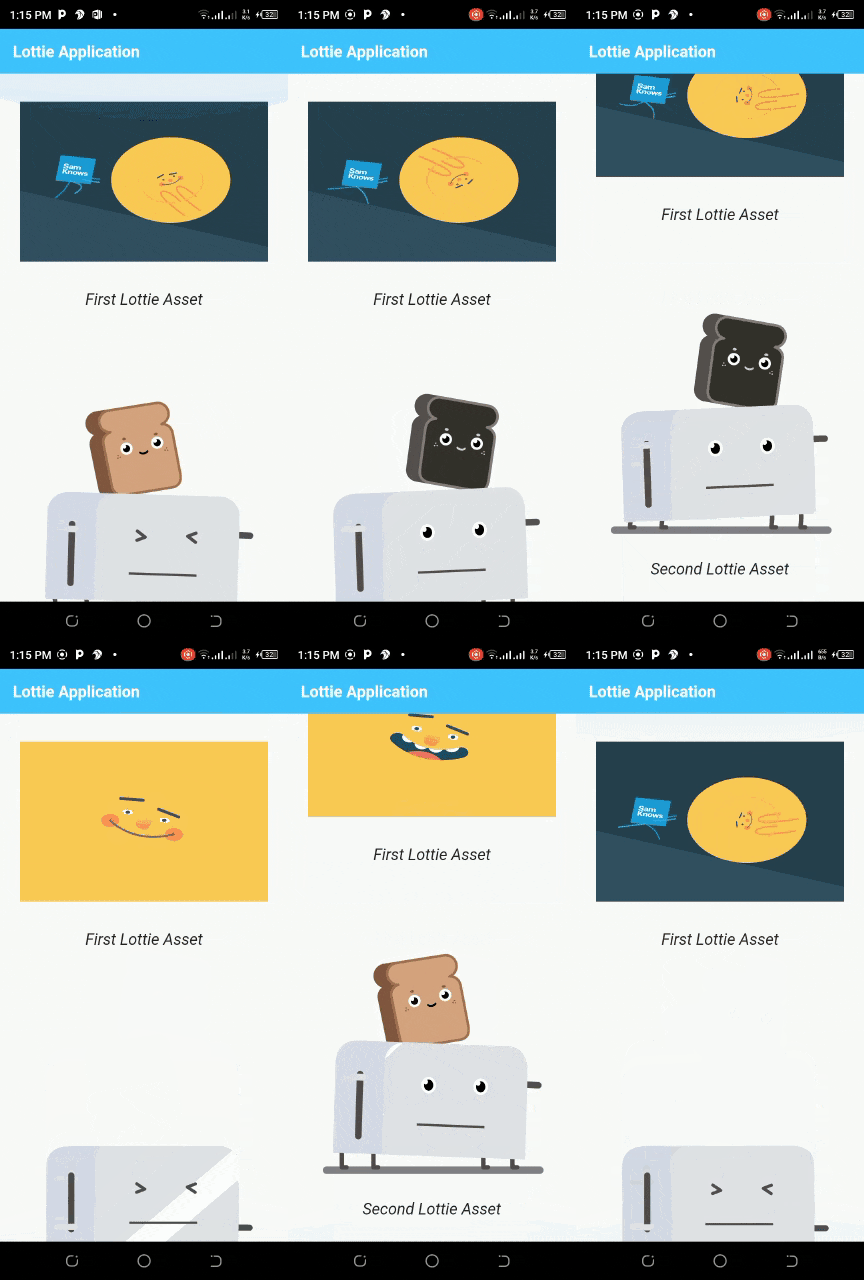
Your result should look somewhat like this...

Looks cool, right 😎?, I hope you did yours too 😏.
There are other ways to manipulate your Lotties while using them, you can learn more on pub.dev.
Till next time, Bye for now 👋🏿

