


Video-call is one of the wonders of technology. I mean seeing the person one is talking to in real-time is just mind-blowing 🤯.
Sometimes I feel like programming is a form of magic because the way this could have been possible would have been through the use of a magical mirror ✨or so, but thanks to technology here we are 😎.So today we would be building a simple video-call app using Flutter and Agora.
What is Flutter?
Flutter is a programming language used to develop cross-platform applications (applications that can run on multiple operating systems).
And Agora 😕?
Agora is a real-time communication system that makes the development of real-time communication applications easy, thus eliminating the stress involved in developing a real-time communication app, you can visit their website www.agora.io/en/ to learn more about them.
Now let's get to work, shall we? 🔨
Our app would have the most basic function of a video-call app which is two visual views showing the caller and the receiver. For this project we would need two packages there are
- permission_handler: to request access for media functions of a mobile device, for example, permission to use the camera, microphone and so on.
- agora_rtc_engine: to have access to the inbuilt methods and functions of the Agora SDK to allow for real-time communication in our app.
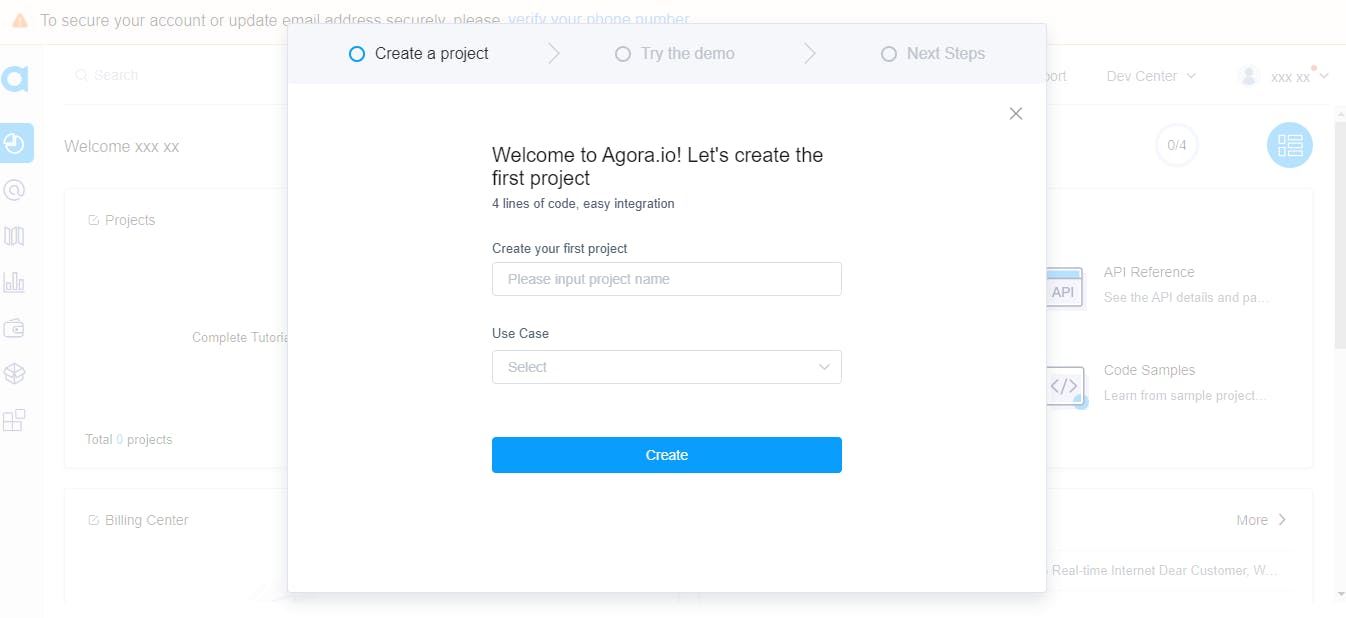
After signing up and all you should see this, now let's create a project you could choose whatever name since it's not a production app, so I would call my project
basic app. For the use case, I chose social/Live stream.
📌NB: whatever use case you choose, it really won't matter as all use-cases allow for video streaming.
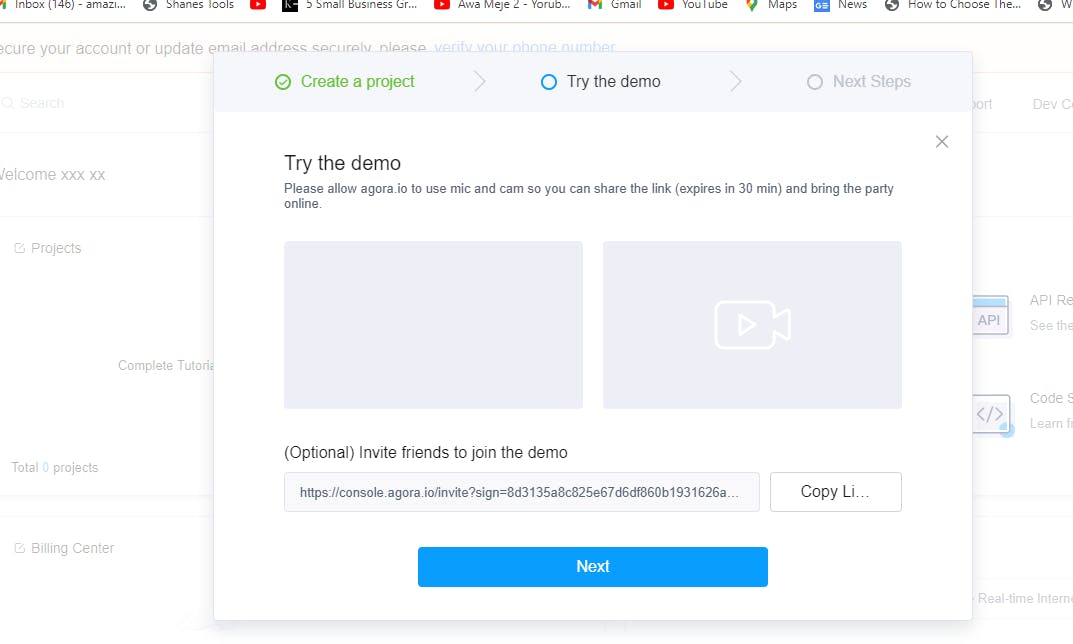 You should be seeing this next, just click on the X to skip the remaining steps.
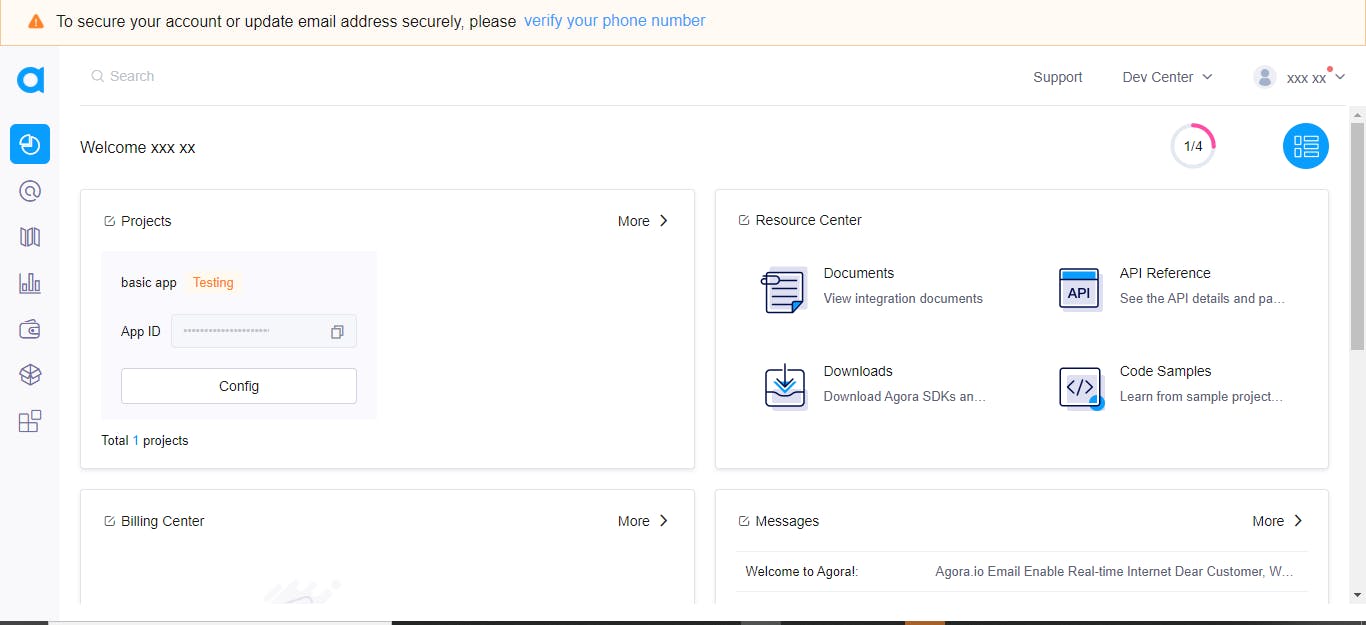 What you see now is more like the main console that shows an overview of what agora is capable of doing, now you see projects right? copy your app id and paste maybe into a notepad because we would need it later. Then click on more in the projects section, it should take you 👇
 Remember our project name? you should see it there, now click on config, and it should take you 👇
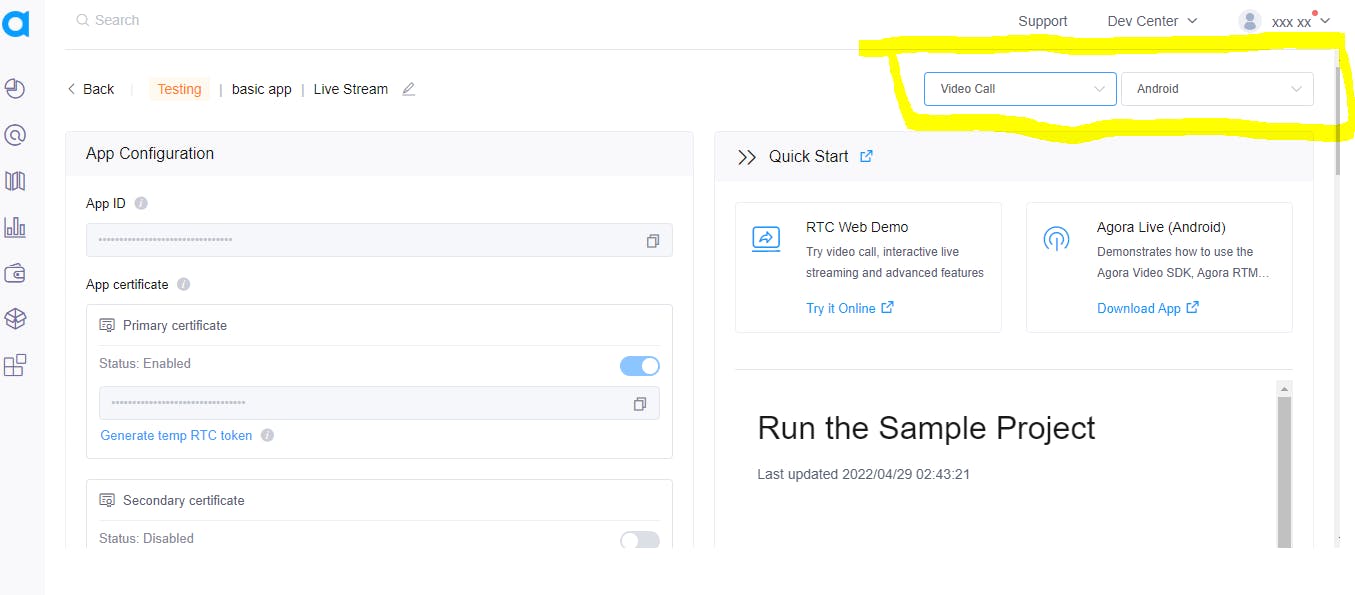 on the top right corner, select Video-Call and Android in their appropriate drop-downs then click on Generate temp RTC token, this is to allow us to generate a temporary RTC(real-time communication) token just for testing purposes (remember we are not building a production app 🙃).
Clicking on Generate temp RTC token should show a pop up like this 👇
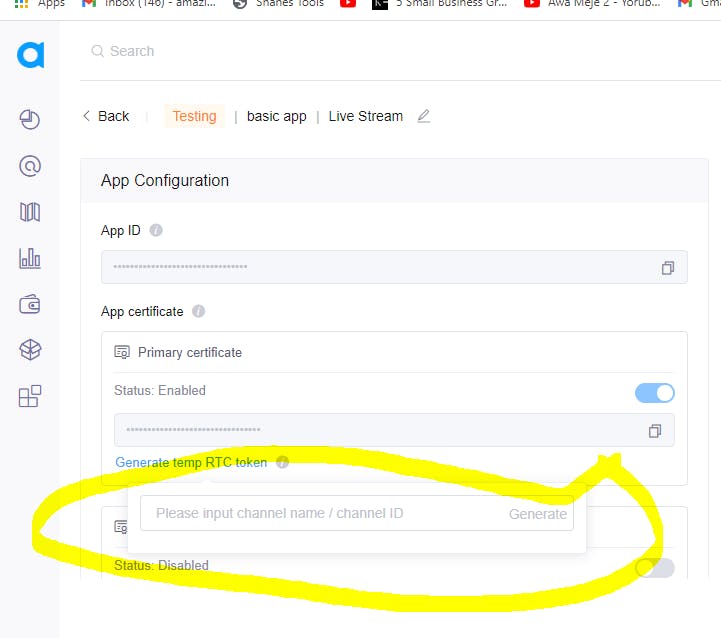 I would name my channel secondchannel then click on Generate, do not forget your channel name as we would need this later. After clicking on Generate, you should see 👇
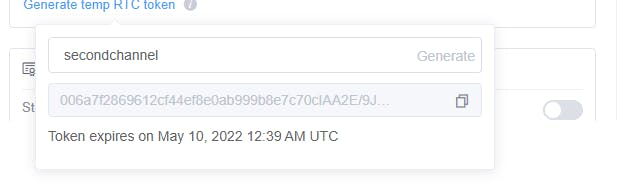 Copy the token as we would need that token later as well. Now we are done with setting up our Agora RTC for this project.
Let's write some Code, Shall we? 👨💻
let's import the following into our main.dart file. Remember the token, channel name and appId from the Agora RTC platform right? we would create string variables for these data as well
📌 Do not attempt to use my token, and appId it won't work. Tokens and IDs are unique to projects.
import 'dart:math';
import 'package:flutter/material.dart';
import 'package:agora_rtc_engine/rtc_engine.dart';
import 'package:agora_rtc_engine/rtc_local_view.dart' as RtcLocalView;
import 'package:agora_rtc_engine/rtc_remote_view.dart' as RtcRemoteView;
import 'package:permission_handler/permission_handler.dart';

const token =
    "00676ed95f80d184068bb99f765bf181af9IAANaYw7ifjwHn5XAr1ssXmh6zDp3yeGvJRjMatLbnvVa1pH9K4AAAAAEADKF8m8qyZpYgEAAQCrJmli";
const appId = "76ed95f80d184068bb99f765bf181af9";

const channel = "secondchannel";
From the agora_rtc_engine we import rtc_local_view and rtc_remote_view to serve
for the views of the caller and the receiver, rtc_local_view for the caller and rtc_remote_view for the receiver. And I name them RtcLocalView and RtcRemoteView respectively.
Next, we would create a main method like 👇
void main() => runApp(const MaterialApp(
      home: MyApp(),
      debugShowCheckedModeBanner: false,
    ));
Here I create a MaterialApp, to know more about the MaterialApp class visit
https://api.flutter.dev/flutter/material/MaterialApp-class.html. Also, I make my debugShowCheckedModeBanner false and my home is called myApp which is a stateful widget.
Now let's create myApp, shall we 😎?
class MyApp extends StatefulWidget {
  const MyApp({Key? key}) : super(key: key);

  @override
  State<MyApp> createState() => _MyAppState();
}
And in my _MyAppState() I do 👇
class _MyAppState extends State<MyApp> {
  int? _remoteUid;
  RtcEngine? _engine;

  @override
  void initState() {
    super.initState();
    initForAgora();
  }
Here I create an integer variable called remoteUid and a RtcEngine variable called _engine. remoteUid is supposed to cater for the id generated for the receiver whenever they join a call, while the _engine would allow us to have access to all of Agora's in-built methods that would enable us to develop a hitch-free application.
Also I create an initState for a function called initForAgora(), now let's create initForAgora() 🔨
 Future<void> initForAgora() async {
    await [Permission.microphone, Permission.camera].request();

    //initialize engine
    _engine = await RtcEngine.createWithContext(RtcEngineContext(appId));
    await _engine?.enableVideo();

    _engine!.setEventHandler(RtcEngineEventHandler(
      joinChannelSuccess: (channel, uid, elapsed) {
        print('local user $uid joined');
      },
      userJoined: (uid, elapsed) {
        print('remote user $uid, joined');
        setState(() {
          _remoteUid = uid;
        });
      },
      userOffline: (uid, reason) {
        print('remote user $uid left channel');
        setState(() {
          _remoteUid = null;
        });
      },
    ));
    await _engine?.joinChannel(token, channel, null, 0);
  }
initForAgora() is a future class of an asynchronous function that does the following
- await [Permission.microphone, Permission .camera ].request() : this request for permission to have access to a device microphone and camera.
- _engine = await RtcEngine.createWithContext(RtcEngineContext(appId)) : awaits the RtcEngine to create with context of RTCEngineContext and it takes a string data appId
- await _engine?.enableVideo(): this await the _engine to enable video (subject to granting camera permission on a mobile device ).
Now to some event handlers 🧰
From the code snippet above we set an event handler to handle the following
- joinChannelSuccess: to check if the receiver joins the call successfully
- userJoined: a setstate method for the remote user/receiver when they successfully join the call
- userOffline: a setstate method for the remote user/receiver when they successfully leave the call
- await _engine?.joinChannel(token, channel, null, 0): to allow a remote user/receiver to join a call after the parameters are met, where channel and token are the string data we created earlier.
Now let's design the app 🖌️
Like I said it's a simple application, so the design is pretty basic. of course, you can play around with the design as you wish but I did this 👇
 @override
  Widget build(BuildContext context) {
    return Scaffold(
      appBar: AppBar(
        title: const Text('Agora Video App'),
      ),
      body: Stack(
        children: [
          Center(
            child: _renderRemoteVideo(),
          ),
          Align(
            alignment: Alignment.topLeft,

            child: Container(
              width: 100,
              height: 100,
              child: Center(
                child: _renderLocalPreview(),
              ),
            ),
          )
        ],
      ),
    );
  }
So I used a scaffold widget and gave the app bar a title. For the body, I used a stack widget with a centred child called _renderRemoteVideo() and I also aligned to the top left of the screen a container with a child called _renderLocalPreview().
What is _renderRemoteVideo() and _renderLocalPreview() ?🤨
These are two methods to handle the view of the caller and the receiver, check out the code snippet below
 //Local/Original User Video
  Widget _renderLocalPreview() {
    return Transform.rotate(
      angle: 90 * pi / 5,
      child: const RtcLocalView.SurfaceView(),
    );
    // return const RtcLocalView.SurfaceView();
  }

//Remote/Reciever User Video
  Widget _renderRemoteVideo() {
    if (_remoteUid != null) {
      return RtcRemoteView.SurfaceView(uid: _remoteUid!, channelId: channel);
    } else {
      return const Text(
        'Please wait for remote user to join',
        textAlign: TextAlign.center,
      );
    }
  }
📌 For the _renderLocalPreview() the view on a mobile phone/ emulator might be a bit slanted, you can play around with the angle to get a perfect fit.
At this point, your app should look like this
The camera showing my face is the local view of the app. we don't have a
receiver 😏yet, But you see the text saying Please wait for remote user to join right? That accounts for the receiver view.
It was quite a journey, right 😏? Thanks for sticking around till the end 🤗, I hope you find this article helpful.
Shalom 👋🏿